Translate

Tuesday, June 26, 2012

Eduard 1:48 MiG-29UB

Thank You Eduard!


You can make the case that a lot of the extras available to today's kits can be excessive. Ultra tiny details that no-one can see once a model is built. I have to say in the case of the Eduard offering here, all the extras made the difference! 
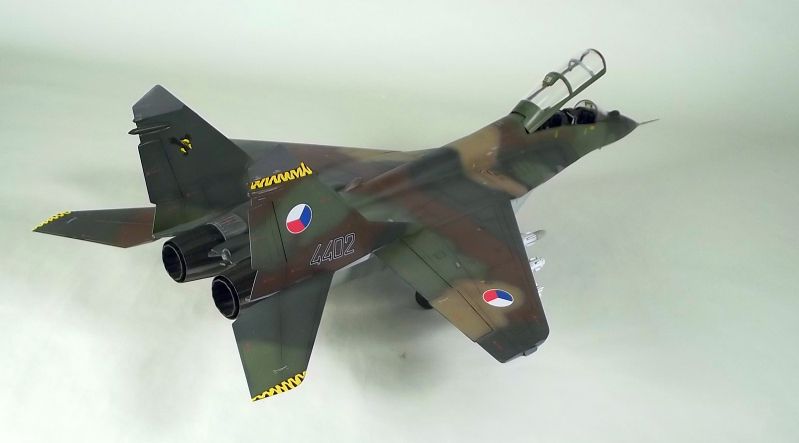
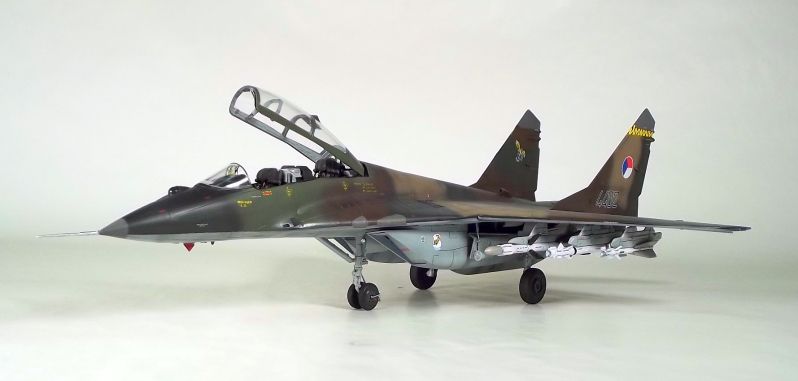
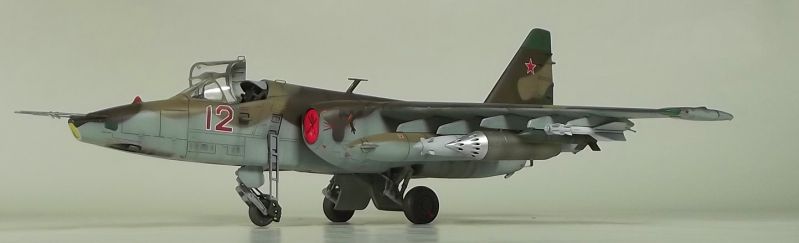
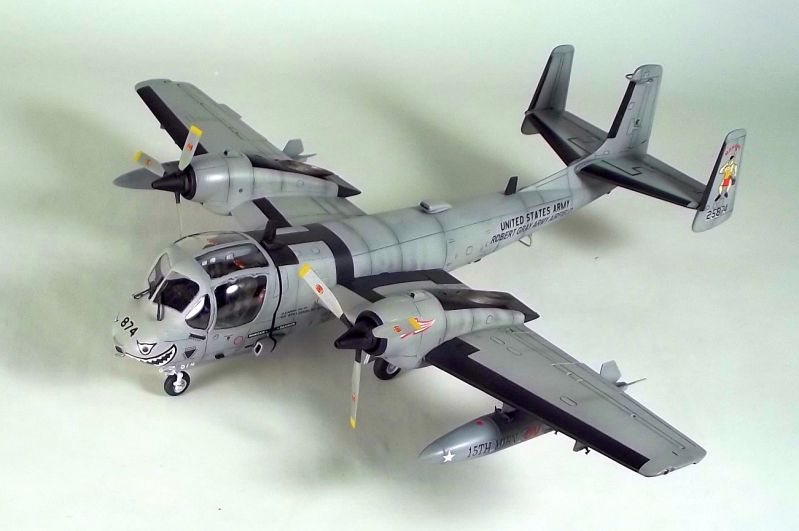
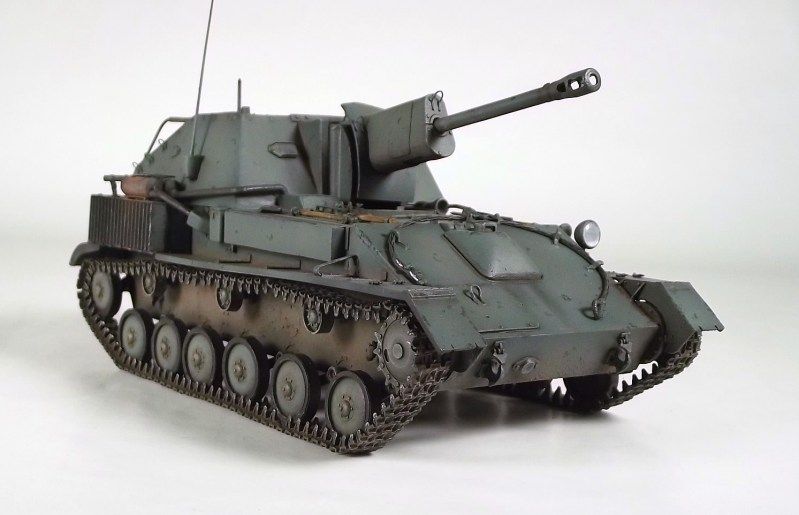
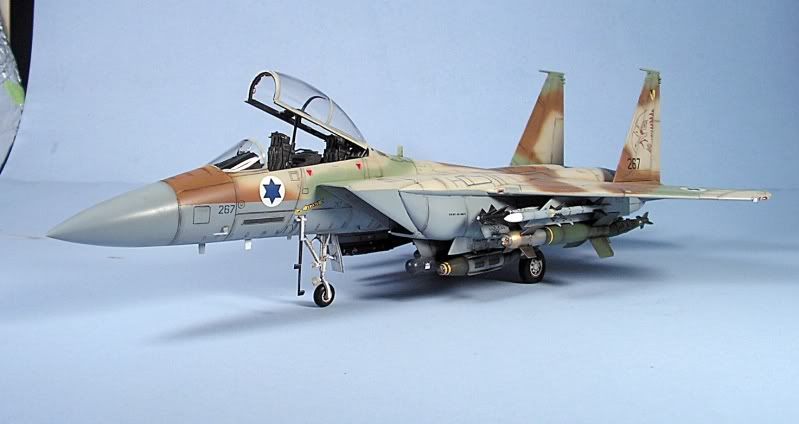
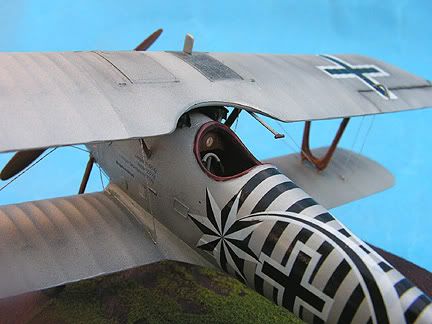
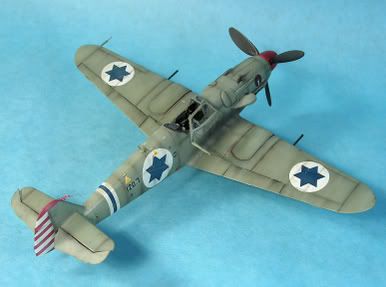
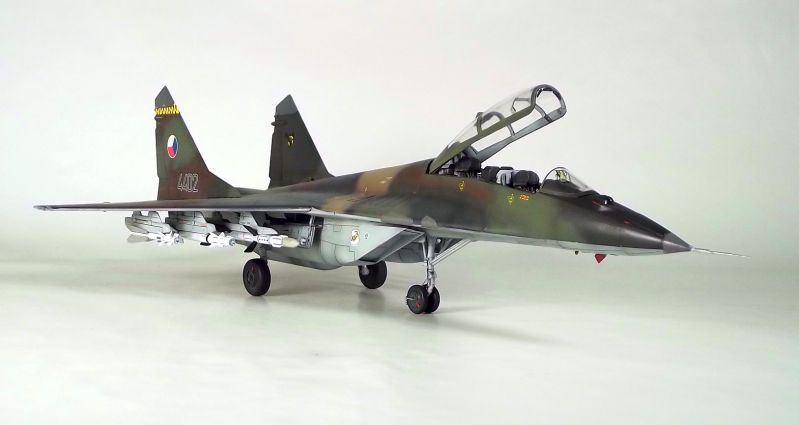
Soft-edged free-hand camo shown well here. Overspraying along demarcation lines helps enhance to look.
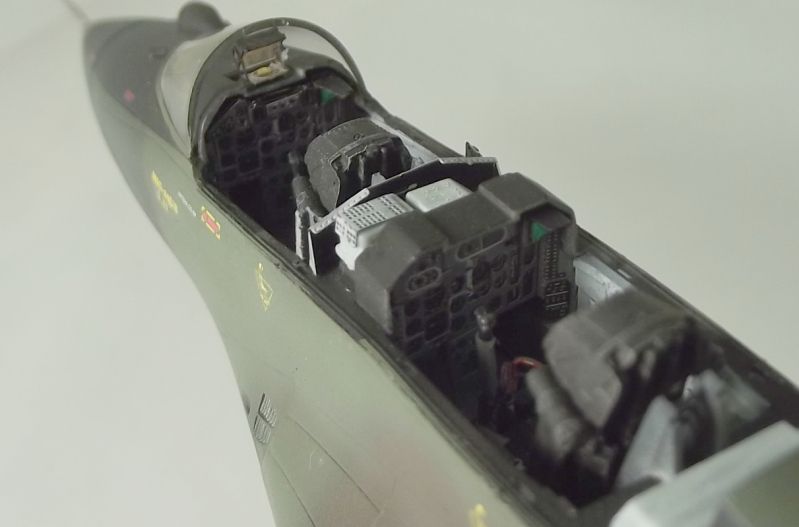
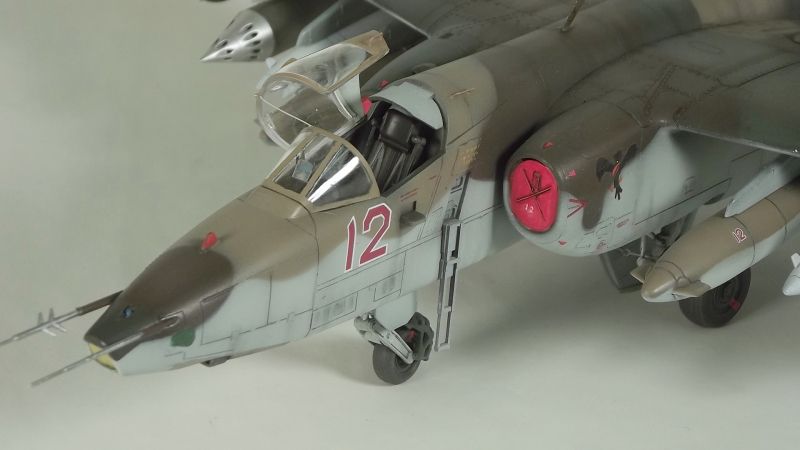
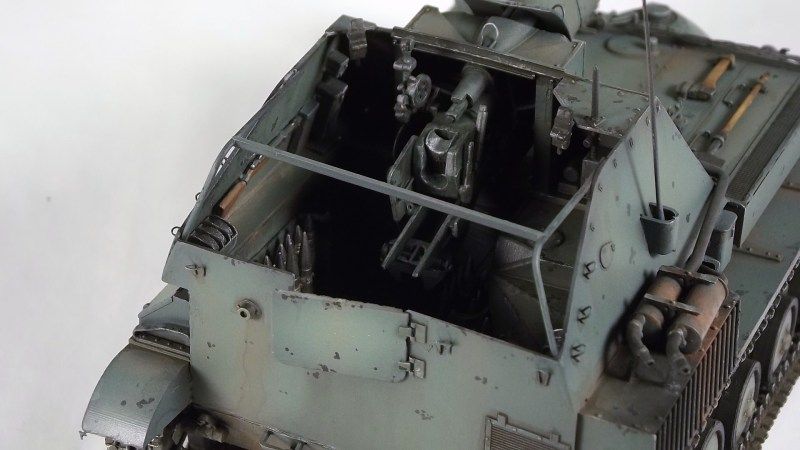
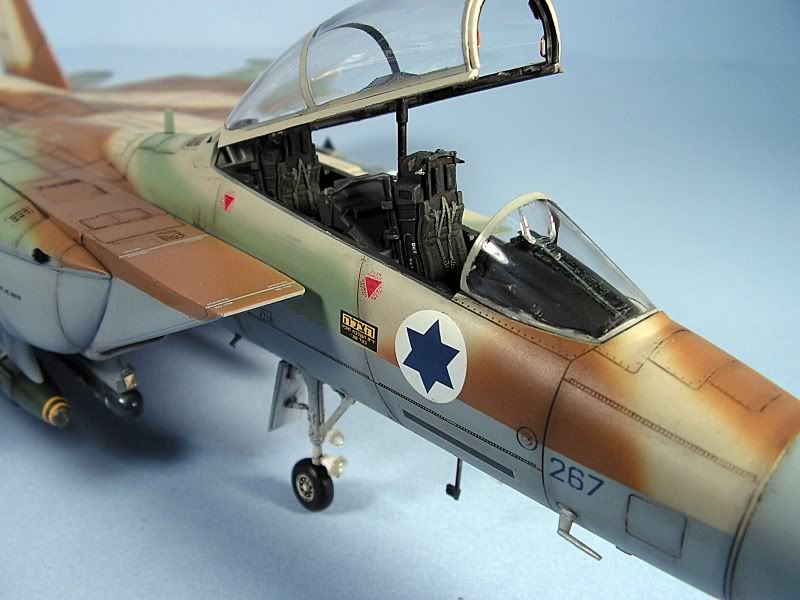
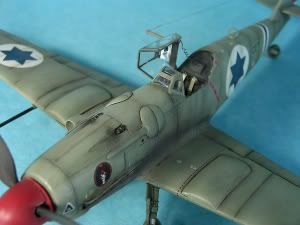
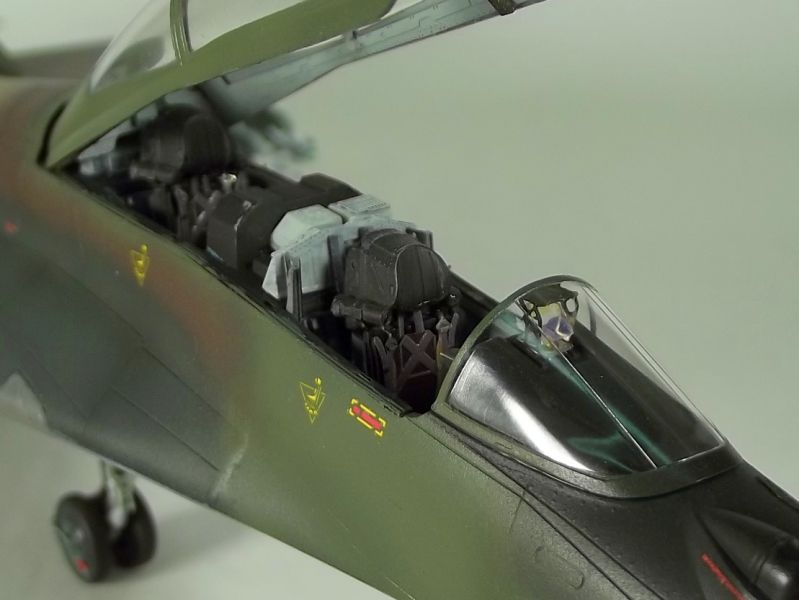
Eye Candy! Good details thanks to Eduard


My customer wanted an accurate MiG-29UB and unlike some customers, left the model choice up to me. Now, in 1:48 scale there are not a lot of options, but after seeing all the extras that eduard packed into this model, and reading reviews of the original Academy kit, I knew this was the way to go. 
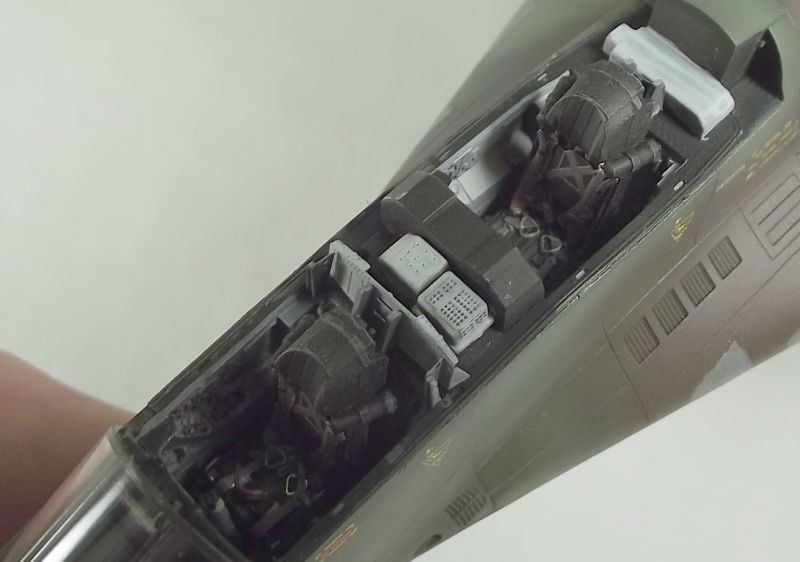
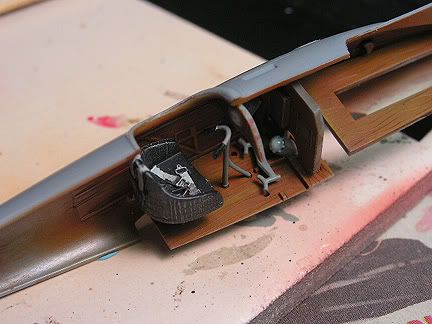
Good resin seats and Photo-etched harness
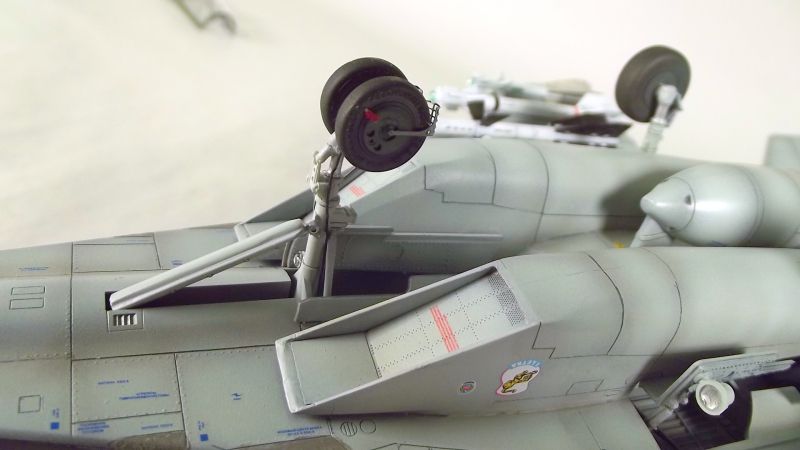
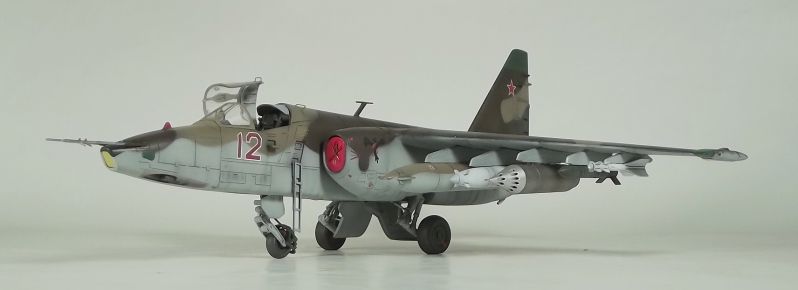
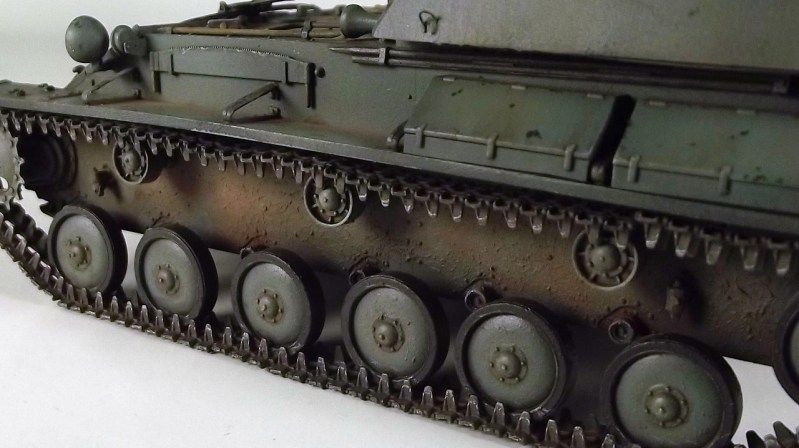
Nice wheel guard, and some details I added


The Academy kit is externally o.k. (I'm not a rivet counter...I do however try to correct blatant errors) but the cockpit was horrible and featured Barco-Lounger couches for ejection seats...yuc!
The eduard kit provides excellent seats as well as pre-painted consoles for the cockpit. I had never used the pre-painted stuff before, but I'm sold!


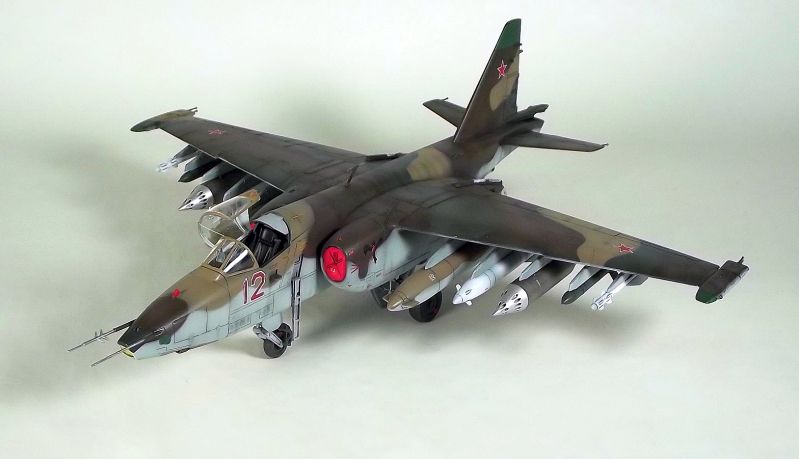
There were over 200+ stencils that covered the plane, pylons missiles etc.
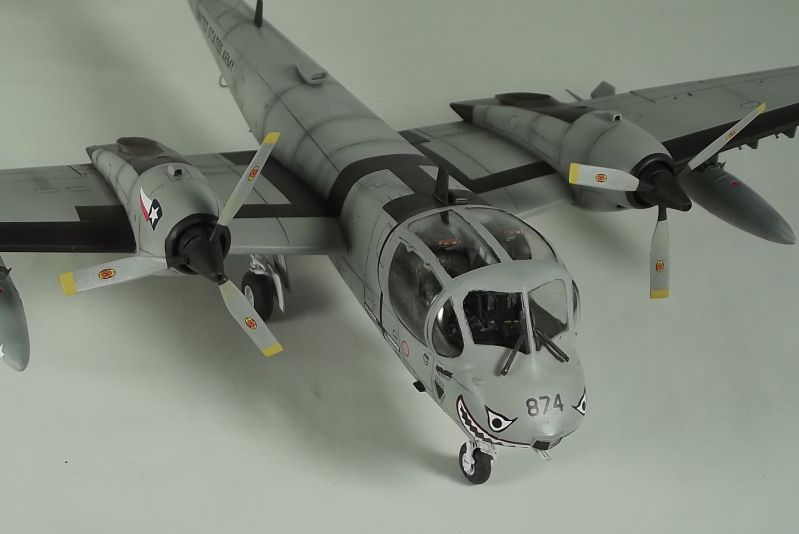
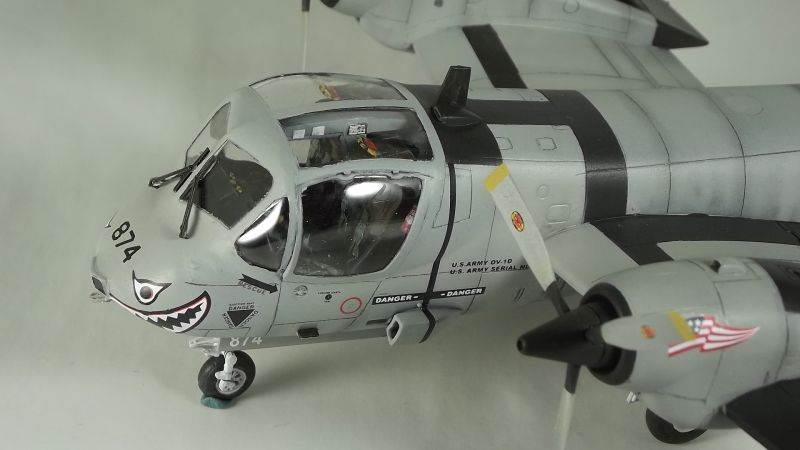
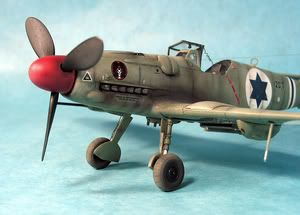
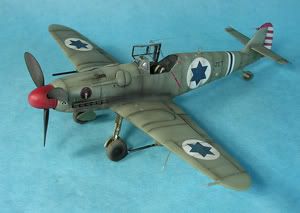
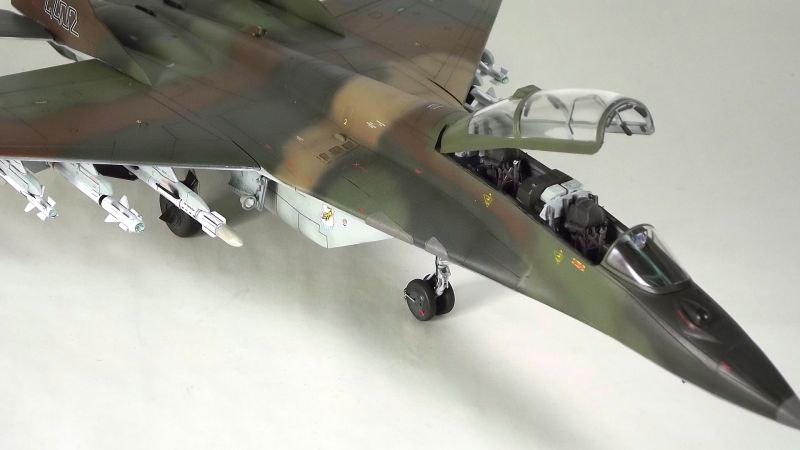
Long nose of the UB
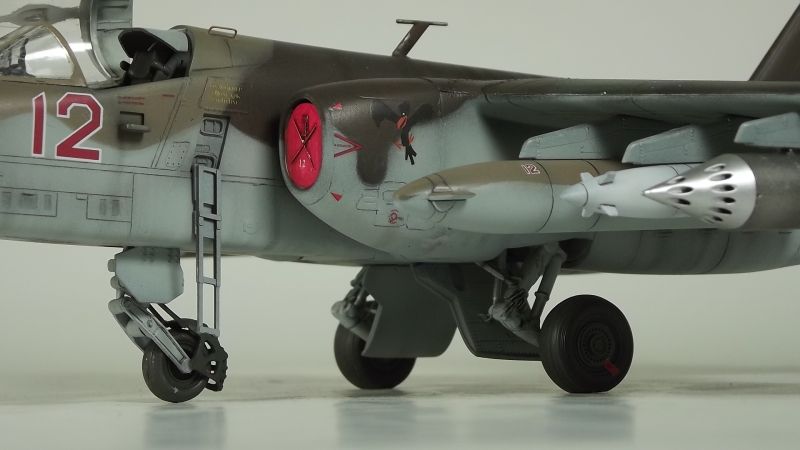
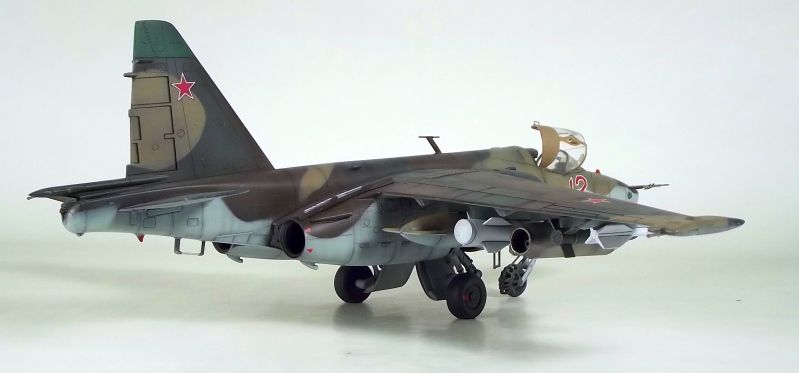
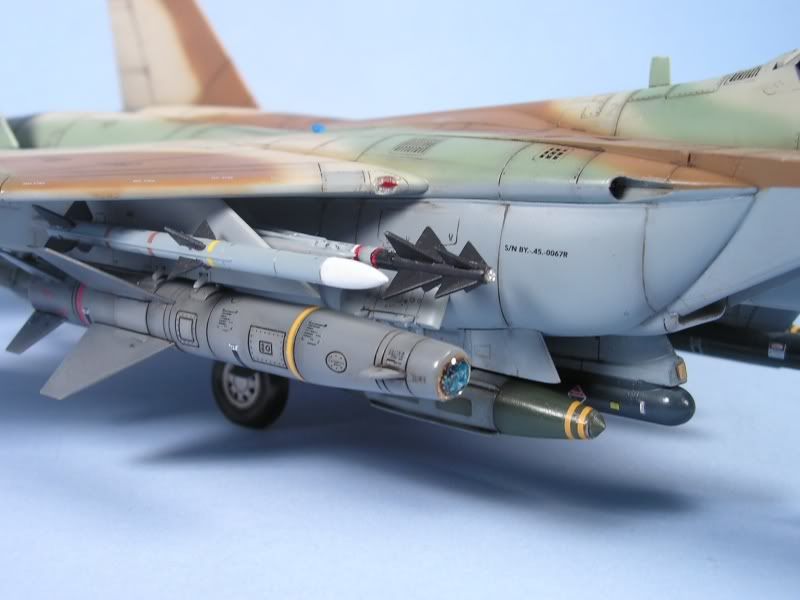
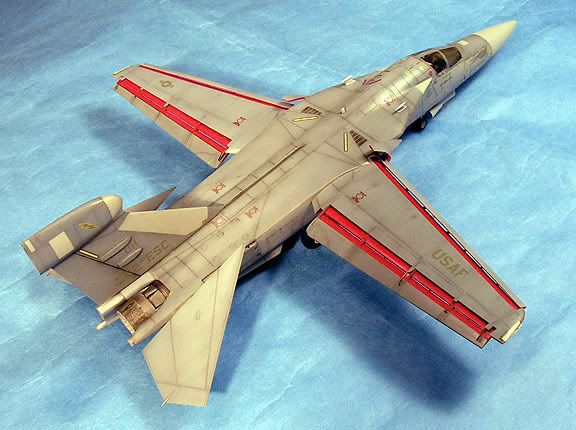
Subtle weathering on the underside along with details of the missiles.
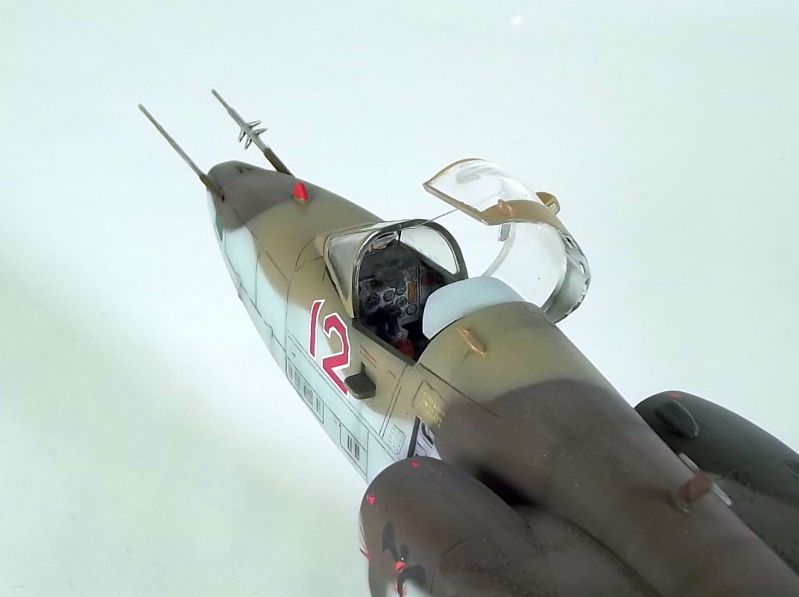
Check out that HUD!


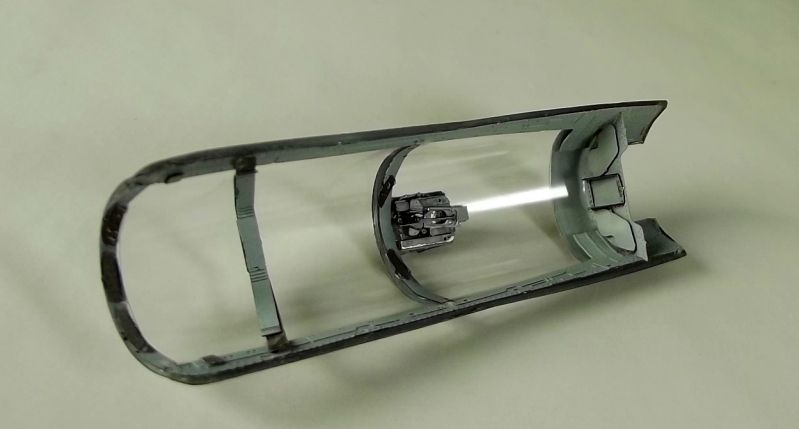
Main canopy details. The photo etched details of the periscope is excellent. IT's hard to see but the rear-view mirrors are there too!


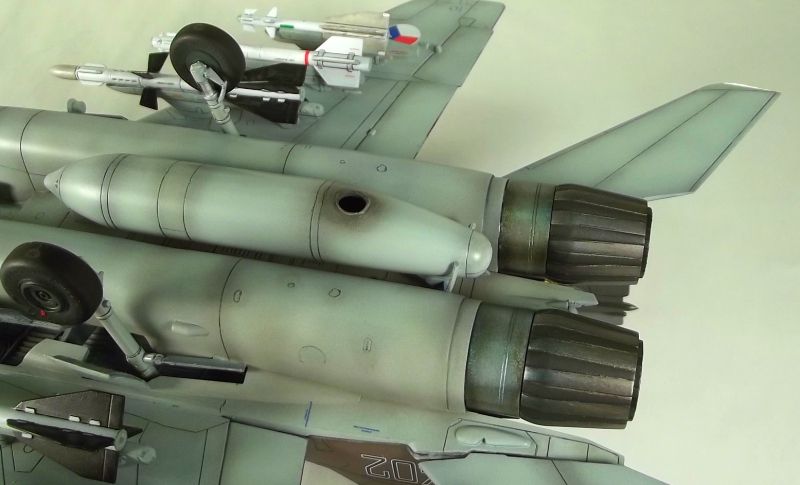
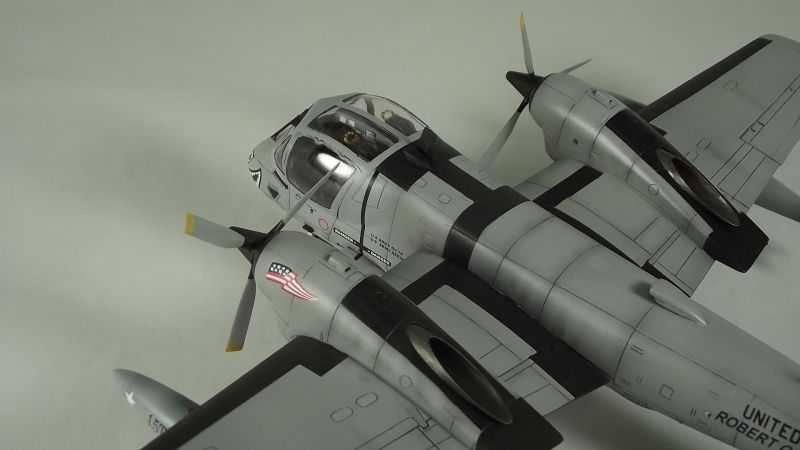
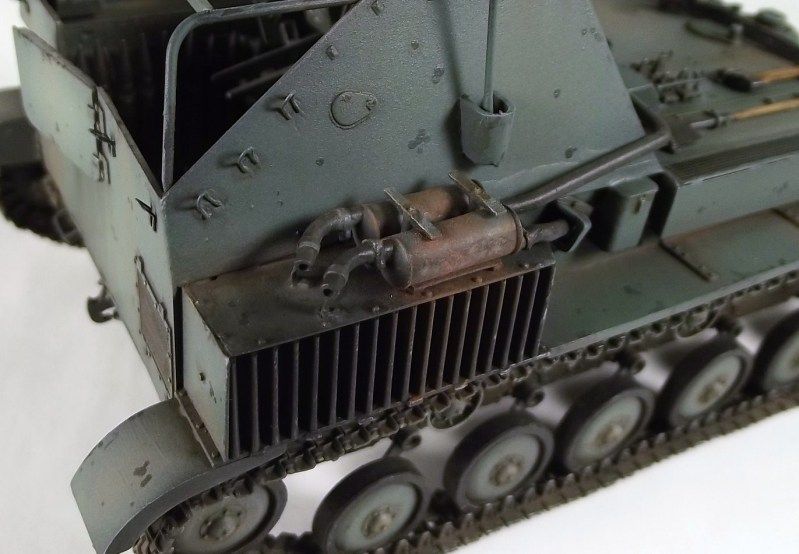
APU exhaust that goes THROUGH the external tank! 


The canopy details are outstanding and the HUD and periscope detail are simply awesome. I did add a little of my magic with the missile lenses and HUD glass, and it looks like a winner. 
The camo was unique to the Czech version (and later Polish when they bought this plane), and I used some thinned overpainting this time and was very pleased with the result. Esp. the underside where dirt and grime collect near the back of the plane. The engine exhaust was painted with a combination of acrylics, RUB-N-BUF silver, and Tamiya clear blue, to help with the burnt engine look so familiar with Fulcrum engines.
Please Note: There are some tiny details like the AOA sensors, anti-static wicks, etc. left off for shipping.

Thursday, June 14, 2012

Revell 1/48 Su-25 Frofoot

Su-25 Frogfoot "Red 12"

Su-25 Frogfoot

Some kits just surprise you. I really didn"t think much of this kit before I built it. Once built it really captures the look and brutish feel of the "Rook".  The details are pretty good, with both raised and recessed details. the cockpit is o.k. but could really use an upgrade. The rocket pods were both wrong shaped and undersized. I used the rockets from a trumpeter kit and really liked the results 


'

Thursday, June 7, 2012

Roden 1:48 OV-1D Mohawk

Roden OV-1D Mohawk
This is a grat looking replica, with plenty of detail. I added some bits to dress up the cockpit. The customer requested the cockpit be closed, but you can still see most everything inside due to the big glass.

The markings are for a retirement scheme on a restored OV-1D now at the Carolina Air Museum. I Used the Superscale sheet. One problem is that some of the decals are a tad oversized. I weathered it with some pastel chlks and oil washes.


Big bug-eyed bird...

Overall the fit is pretty good, with the canopy being the toughest part. BE warned: this is a tail dragger! I loaded it with weight, but despite cramming lead weights in the nose and behind the cockpit, it still wants to drop on its tail. I little dab of blu-tac on the nosewheel keeps it sitting pretty.


Friday, June 1, 2012

MiniArt 1:35th Su-76

MiniArt 1:35th Jagdpanzer Su-76(r)

Well, here is another one finished! This is the venerable Su-76 in all it's glory! I was asked to build this as a straight Russian version, with no markings. (Perhaps the client will add them later?) It was a beast of a kit to build and I suggest that anyone to tackles this one to read the build article on the Perth Military Review(?). They go into detail on how the mounting beam is located incorrectly on the kit, and if you don't correct it you will have problems...yeah! I had problems. The whole gun mount, front shield and mantlet go together at the same time...you really want to grow an extra hand or two.


Rusty Mufflers detailed with pastels

Gel Medium is used to texture the undersides
The road wheels and individual track links look good once built, but add another tedious work session in order to get them right. Once all done the rest goes o.k. I used a lightened version of Russian Armor green, and weathered with pastels. Instead of the oil wash I normally apply, I was careful to just do a pin wash around details so i wouldn't darken the paint color too much. As always I went a little crazy with the paint chips but after a little base coat over spray they blended in well.

Fighting compartment
Front glacis plate
paint chipping and dusting effects


This is going to a local customer so i will get the priviledge to see his response to the model first hand. I hope he likes it!

There are a couple other build on the workbench, with an Revell A-6E Intruder and Roden OV-1D Mohawk closest to completion. Check back often for updates!

Thursday, May 24, 2012

Revell 1:48 F-15E Strike Eagle converted to the Isreali F-15i Ra'am

Wow, what a cool kit. This was one of Revell's best in this scale. I really wish revell came out with more updated modern jets. This one along with the F-18E/F's are incredible kits that you can still get for under $30.00.

I was asked by a client to convert the kit using the Skunkworks IDF weapons kit, and a conversion set along with decals. The mods are pretty simple, with out too much extra work. There are some cockpit differences.

The actual aircraft would probably never get off the ground configured like this, but the customer requested it this way to show off what it could carry. Pretty impressive all loaded down!

I rarely get to see the place where my models go, but fortunately this model went to a collector in town who is a super nice guy. He has a building outside his home dedicated to scale model aircraft that has to be seen to be believed. He collects from all over the world in all different scales. I was honored to have my kit in his collection.

F-15i Ra'am loaded with Pythons, Popeye guided bomb, and others.

Here's the other side
The "eye" of the Popeye Missile. It was made from a dress sequin with a drop of 2 part epoxy added to simulate the lense.


Nice underside detail-The data-link pod
was scratchbuilt from a spare external tank

Eduard 1:48 Pfalz

This was one of my first forays into WWI aircraft. This was a good little build with nice photo-etched details for the seatbelts, and cooling jackets for the guns. The rigging was a little clunky (all my fault) and I have since learned a better technique for making the wires more realistic.

The decals were a challenge, but like in most cases, it simply took a lot of patience and lots of water.

Here you can see the simple details of the cockpit. No hi-tech dials and gauges here!
The woodgrain effect I achieved with paint and dry-brushing can be seen to good effect here. Too bad you can't see much once the fuselage is closed.

Here is a shot of the gun details as well as more wood-grain effects.

Academy 1:48 Avia S-199

eHere was a simple little kit that I really enjoyed building. This one would certainly qualify as a weekend build, as there is not a lot to it. I added a few details in the cockpit to spice it up a bit, but overall it was out of the box.
Neat history about these aircraft. The fledgling Isreali Air Force bought these ex-german, aircraft to fight against british built, Egyptian Spitfires.


Weathering was accomplished with a combination of post shading with airbrush and pastels. Tamiya acrylics were used to finish.

Hasegawa 1:72 EF-111A

I wish I had a few more pics of this model, but this over the top shot shows some of the great surface detail packed into that kit. I don't remember any particular problems with that build. A really nice kit.

Busy, Busy!

Things around the work bench are buzzing as many projects are being completed. Some of the projects I am working on include the 1:35th MiniArt Jagdpanzer Su-76(r), the Revell 1:48 A-6E Intruder, Eduard 1:48 MiG-29UB, Trumpeter 1:48 Su-24 Fencer and others.

I work in batches jumping between projects as sub-assemblies dry, or paint / weathering cures. Sometimes as a project gets close, all my focus is tuned in one a particular project until completion. Down the line I'll try to post in-progress updates. Until then I want to post a few projects that I've completed in the past. Enjoy!

Wednesday, May 23, 2012

Welcome to my Scale Model Workshop!

I've created this blog as an attempt to provide a glimpse into the process of building professional scale models. Here, I hope to share the struggles, the triumphs and of course pictures of my completed models. I will also share some tips and tricks I've learned along the way. I will give you an idea of what's involved to build some of the latest kits hitting the market.

Reviews? Maybe. But don't expect to see much of the "open the box and look at the parts" variety. I'm a builder. A paid builder. So kits don't last long on my shelves. 

If you are interested in a commission, feel free to contact me. I can usually provide a quote within 24 hours. I build mainly 1:48 and 1:32 aircraft, as well as 1:35 Armor. I have work in museums and private collections all over the world.